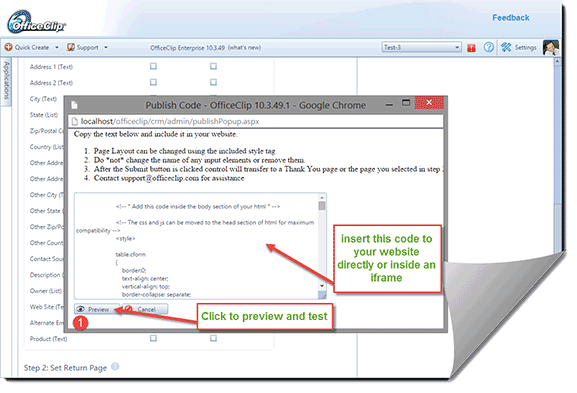
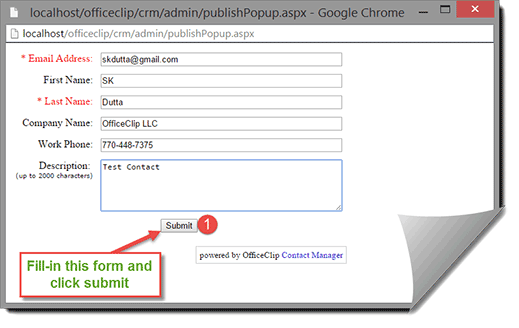
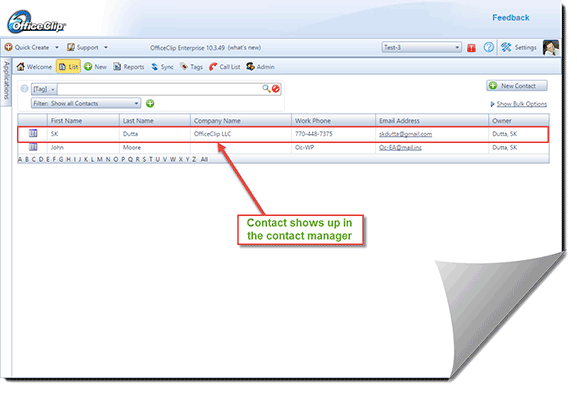
OfficeClip Suite consists of a Free Contact Management Software that can capture leads from your website. Once leads are in the contact manager, you can track, follow-up and convert them into accounts. This article shows how to setup the lead capture module.

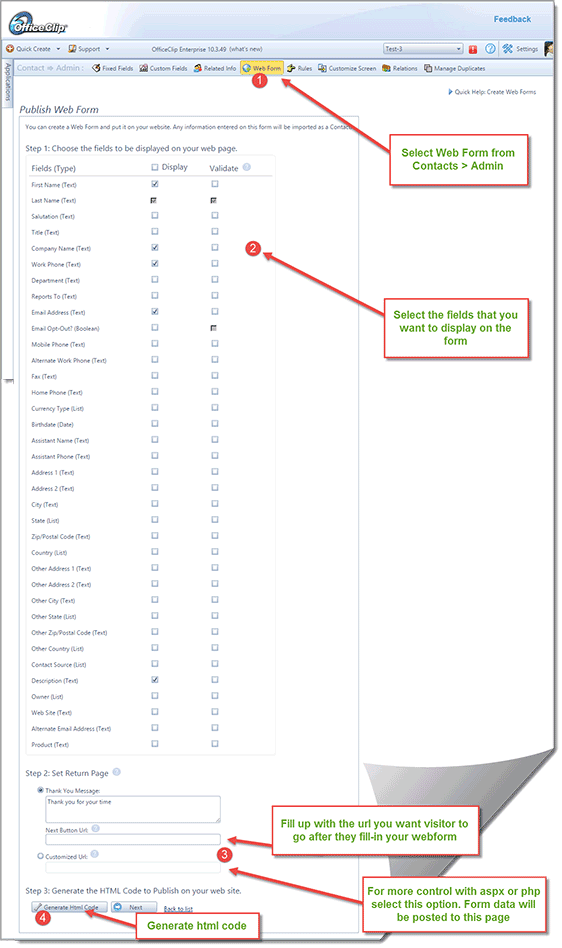
On this page you can set various options for the web form. First select the fields that you want to show in your web form (see 2 in the diagram). There are three options to select the return page, which is shown after your web site visitor completes the web form (see 3 in the diagram).
- Show a Thank You message and have user close the form
- Redirect user to a particular page on your website. For example, you may want to send the user to your download page after they fill-in the form
- For more advanced users, you can send them to an active page (like aspx, php, python etc.). OfficeClip Web Form will do a http form post to this page. You can then access all the values by iterating through them. This option is useful if you want to save the data to a database or want to direct user to different page depending on the options selected on your web form.


SK Dutta is a software architect and creator of OfficeClip Suite of products. He loves to design and develop software that makes people do their job better and more fun. He always explores ways to improve productivity for small businesses. He is also an avid reader in many areas, including psychology, productivity, and business.

