OfficeClip Attendance Tracker helps your company to monitor time to stay on budget with your internal and client projects. Our Timesheet Software is an effective solution for handing all your employee timesheet with simplicity.
OfficeClip Timesheet helps you to:
- Track time spent on various jobs.
- Manage time offs.
- Calculate vacation accruals and payroll of employees.
To use Timesheet for attendance tracking:
- Fill in timesheets manually by entering work hours, work details, and then save the timesheet.
- Or use the Check-in Check-out system. Check-in at the start of the day and check-out at the end of the day.
- Submit timesheets weekly, biweekly, semi-monthly, or monthly as required by your organization.
How to Manage Employee Attendance using OfficeClip Timesheet:
Step 1: Create an Account
Sign Up for free online and create a new account in OfficeClip or download it to your computer.
Step 2: Add Users
Setup new users for tracking time
Step 3: Set up Customers and Projects
The Administrator needs to set up the customer and project for whom time is to be tracked.
Step 4: Set up Tasks
The Administrator sets up the tasks for each project and sets whether they are billable or not billable.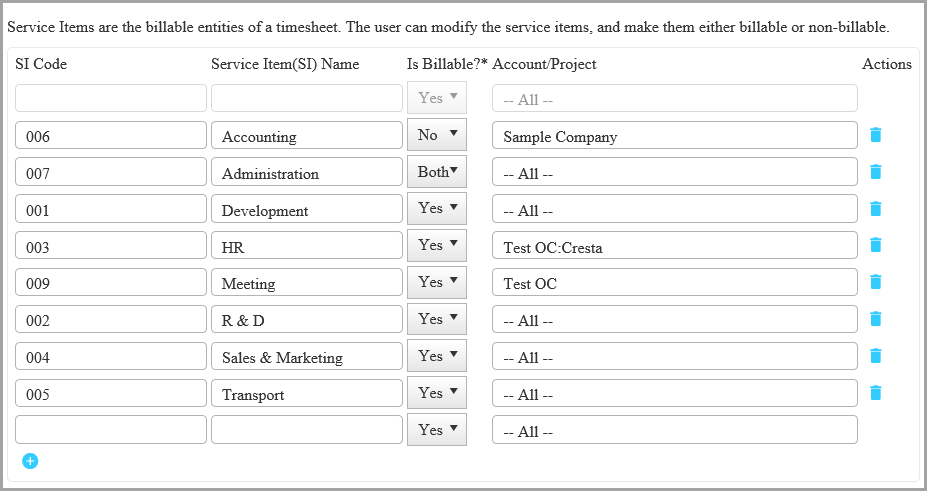
Step 5: Set up the Approval Routing
A supervisor or a manager approves timesheets for each user. So this workflow is set up in advance by the Administrator for approving or rejecting the timesheet.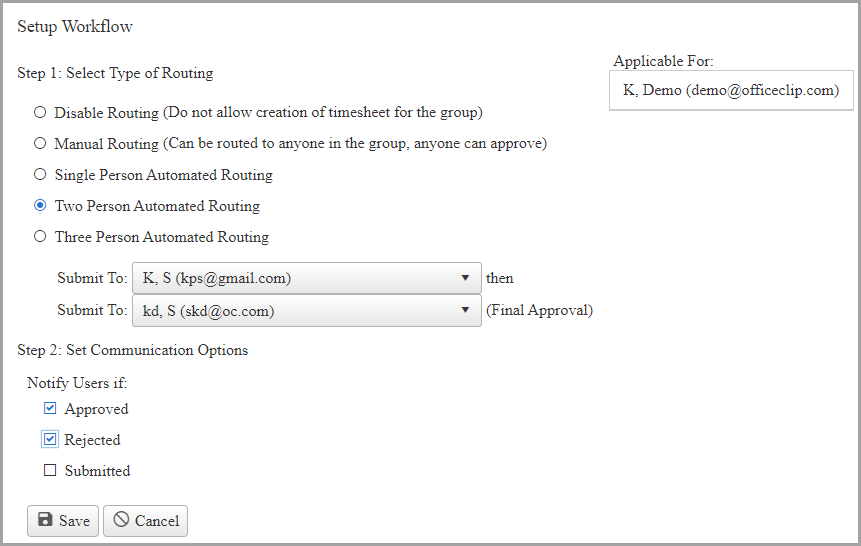
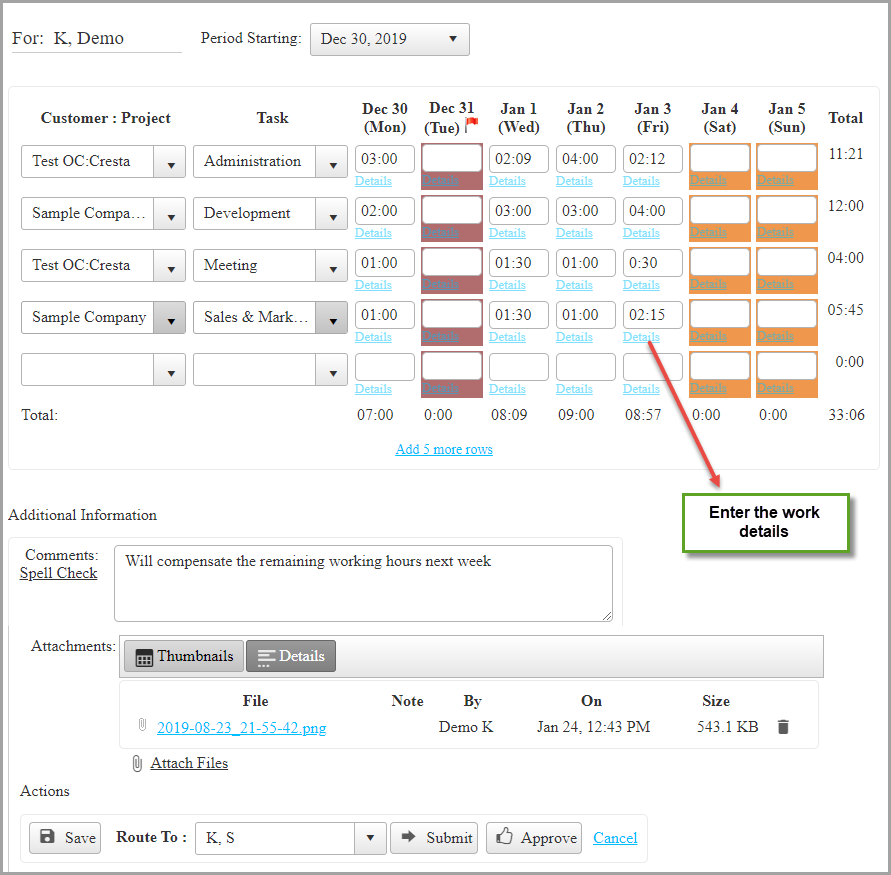
Step 6: Enter working hours in a timesheet
* Manually
Enter the working hours, work details, enter comments, attach documents, and Save the timesheet. At the end of the week, submit the timesheet.
* Check-in/Check-out mode
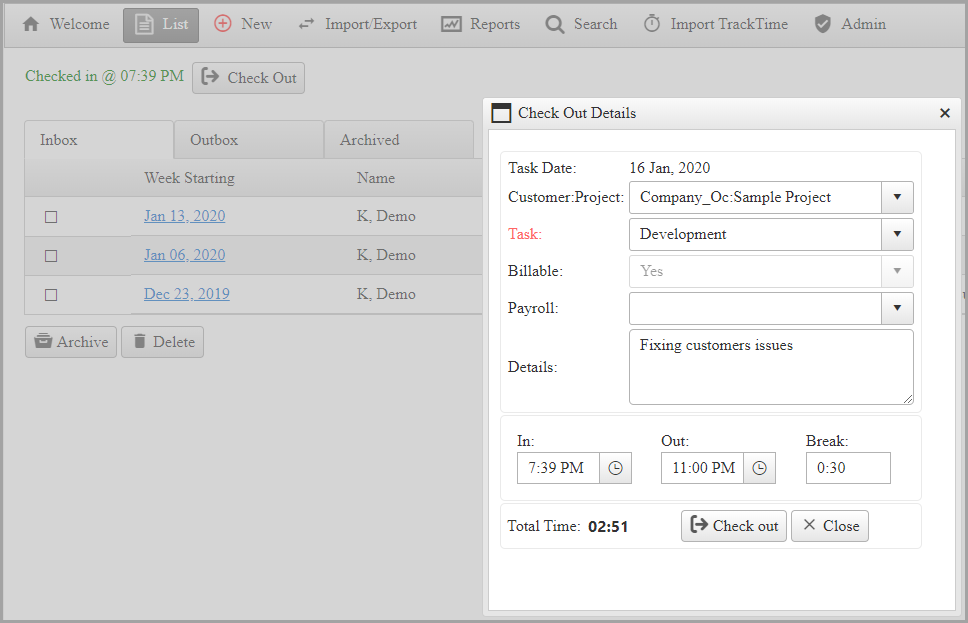
Click on the check-in button when you start working and at the end of the day, click check-out and enter the project name, task and work details, break hours, and click check-out to save the timesheet. If the user forgets to check-out, the system automatically checks him out after 10 hours or 12 hours.
Step 7: See who worked on what in real-time through Reports
Through the reporting system, check the details of work done, tasks allocated to employees, and project status.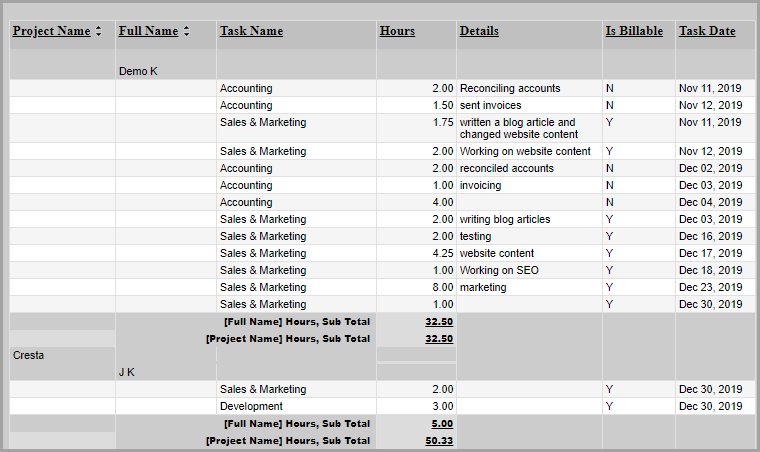
Step 8: Approve or Reject Timesheet
The supervisor or manager then decides whether to approve or reject a timesheet. Rejected timesheets are sent back to the users with comments. The users can see the status of these timesheets in the Inbox.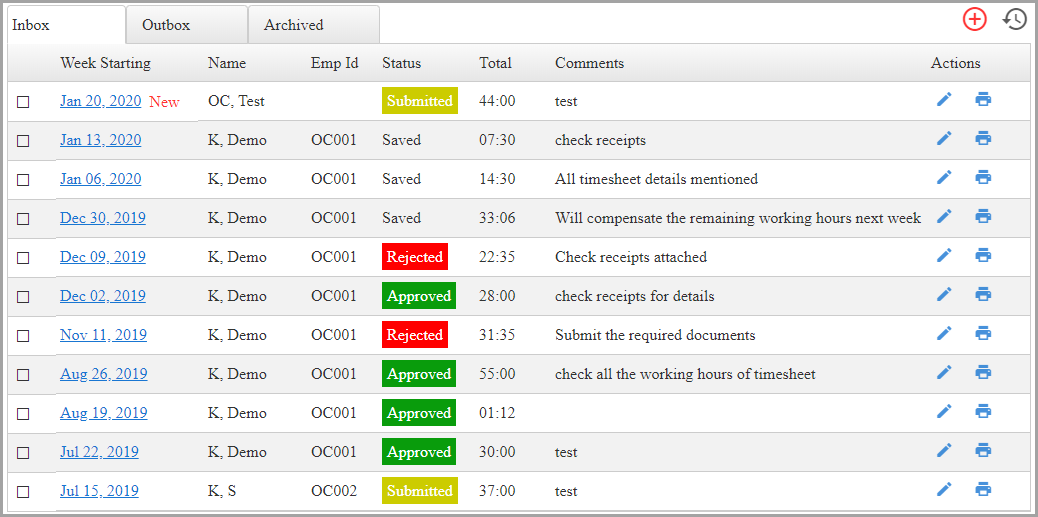
Timesheet features:
-
Proxy
This feature allows a user to fill or submit a timesheet on behalf of another user.
-
Custom fields
Users can create various custom fields for their timesheet as per the organizational requirement.
-
Import Track time
Import time from other OfficeClip applications like CRM, Issue Tracker, Tasks, etc. and create a new timesheet.
-
Invoices
Create invoices by importing timesheet and ensure faster online payments.
-
History
The supervisor can view the changes made to the timesheet in due course of time through history for auditing purposes.
-
Approvals
This feature allows setting up a workflow for getting the timesheets validated and approved by the authorized personnel.
-
Import/Export
Export timesheets in CSV format and export timesheets in ADP payroll system.
-
Search Timesheet
Search individual or group timesheets for overview of work details and check timesheet submission status.
-
Mobile Access
The mobile timesheet app will help the users to create a timesheet and submit it for approval no matter where they are.

